Starting and Stopping a Team SessionUpdated 4 months ago
Summary: How to Run Team Sessions.
Running a Team Session allows you to capture real-time data for every player simultaneously. In order to start a Team session (Game, Practice, or Skills), you only need to have Bluetooth connectivity and to be within Bluetooth range.
Bring the Team case into the locker room and plug it into a power source. Players will get dressed and mount their HELIOS core to their shoulder pads. See link for proper mounting technique.
Starting a Session
Open the Coach App: Ensure you are logged into your Coach Profile and have your Bluetooth turned on. Bring the device to the bench. (Do not start a session from a press box or a place that is to far out of Bluetooth range).
Select Orange Start Button: Tap the orange button with the HELIOS Logo at the bottom center of your App.
Choose Session Type: Select Practice, Game, or Skills.
Note: See Running a Multi-period Session (link) for instructions on capturing individual periods - Elite Teams only.
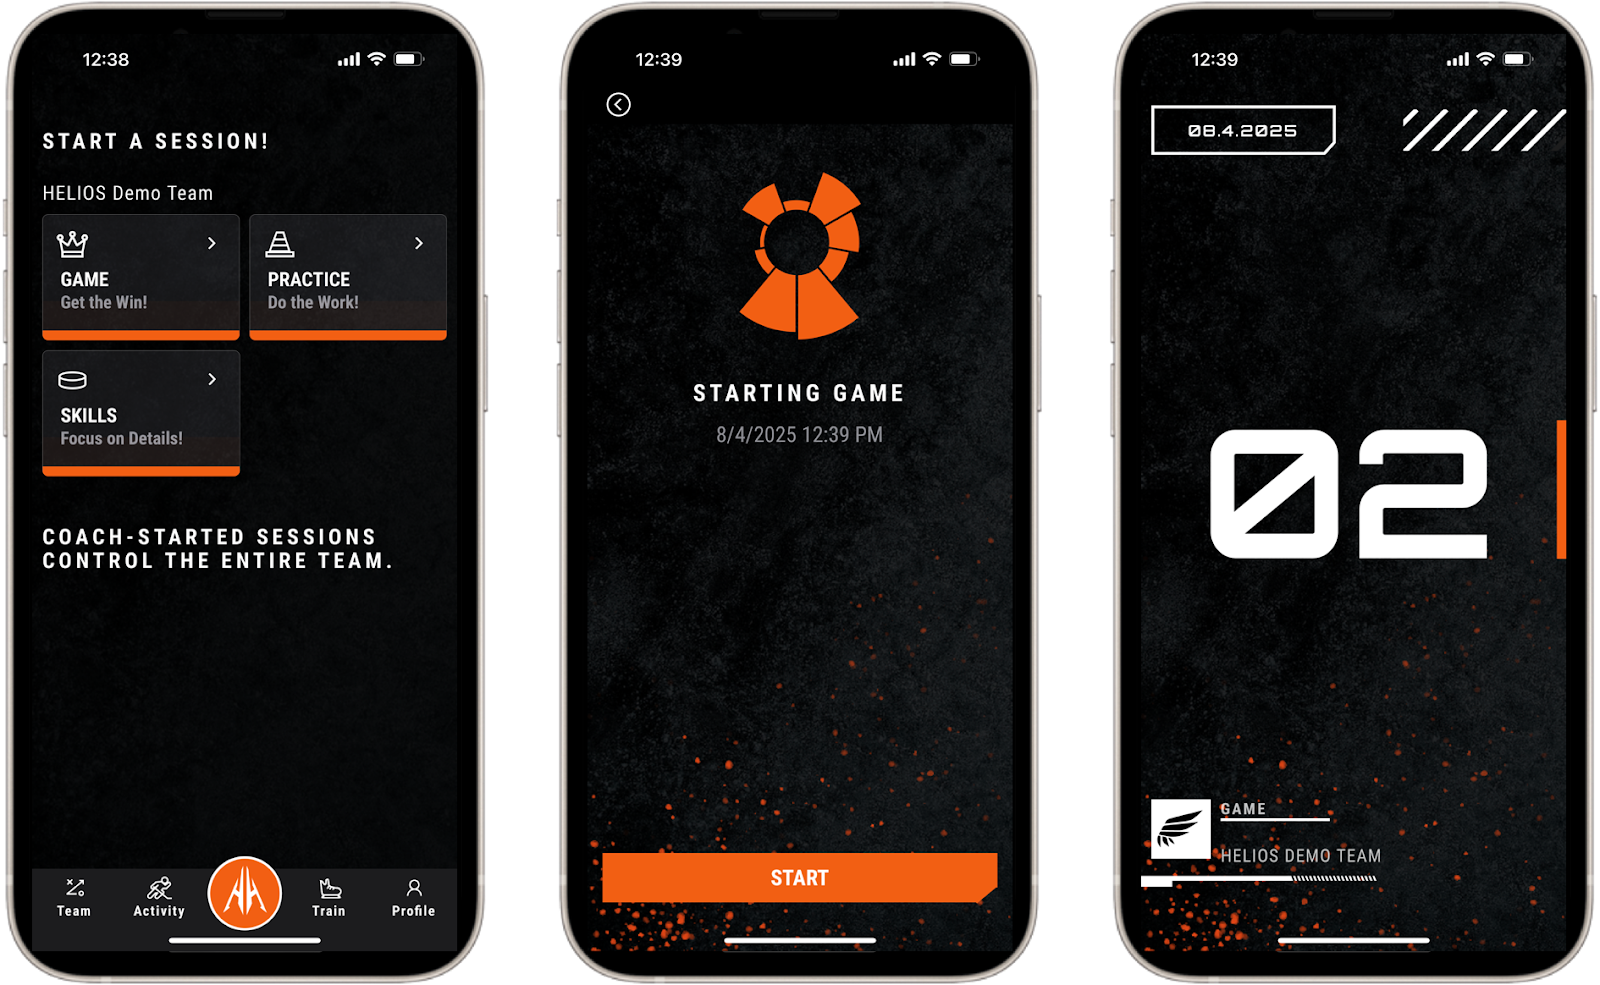
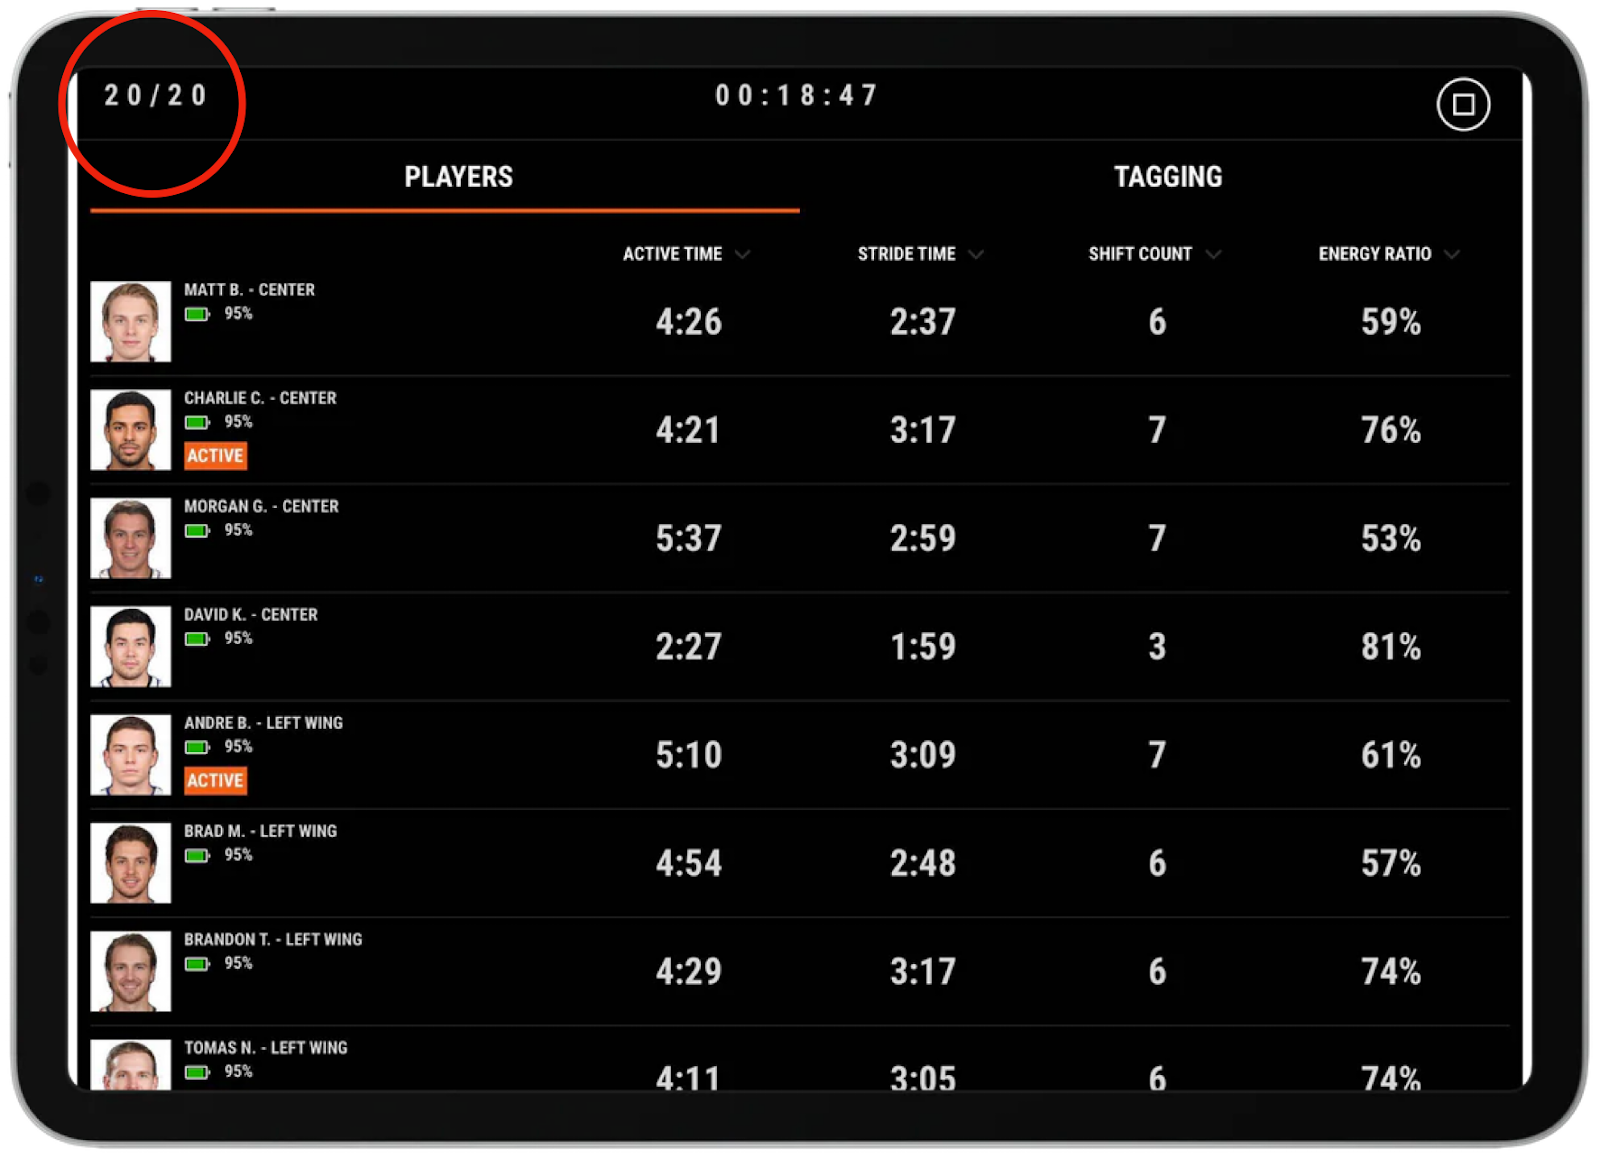
The Participation Check (Crucial): You will see a counter showing how many players have successfully "joined" the session.
Wait for full Participation: Keep the App open and in the foreground until your participation count matches the number of players on the ice.
Note: If you put your device in sleep mode or click off of the HELIOS app before you have full participation, some players will be blocked from joining the session.
OPTIONAL: Puck Drop Tag: If you are using a video that requires a puck drop tag, you will set that during the game or practice. See How To Set a Puck Drop Tag for instructions.
For Games: We recommend setting the Puck Drop Tag at the opening face-off.
For Practices: We recommend setting the Drill Tag at the start of the first drill.
Once all players have joined the session, you can put the device away. Data will flow in real-time (45s delay) to the device during the game or practice/ skills session. Coaches can use this data to monitor workload, time on ice, shift counts, and effort levels as part of bench management/ training optimization.
NOTE: Starting the session at the beginning of warmups will lead to inflated Active Time and impact all data since we will collect warmup skating as part of their activity. Start Game sessions with 10-30 seconds left in warmups to reduce impact on the data.
Stopping a Session
Stop the Session: Once the session is over, tap the stop button in the top right corner. (insert icon) This will immediately start the sync process.
NOTE: You will need WiFi or a cellular signal in order to sync data. See the article for instructions.
Return Cores to Case: Instruct players to return the Cores to the Team Charging Case so they remain awake for the sync process.
Cores go to sleep mode after 15 minutes and are blocked from syncing at that time if not placed on a charger in the Team Case.
Keep Device Near Cores: To ensure proper syncing, the device that ran the session will need to be within Bluetooth proximity to the Cores. Follow the players back into the locker room and leave the device by the case.
NOTE: If you take your device to the lobby, outside, or far from the cores, the Bluetooth connection will be lost, and the cores will not sync.
Syncing Data: Ensure all players’ data syncs. If you are in a rink that has no connectivity, you will need to sync data once you return to connectivity at home, hotel, lobby, or elsewhere.
Syncing data consistently is critical for healthy and reliable insights from the data. It also helps drive adoption with players and parents.
Once data is synced, players can instantly see their game data for instant feedback.